
Create First Digital Product in a Weekend — Step by Step (2026)
What if you could create your first digital product this weekend — and have it earning money by Sunday night?
Not a months-long project. Definitely not a complicated course. Just one simple digital product built over a single weekend.
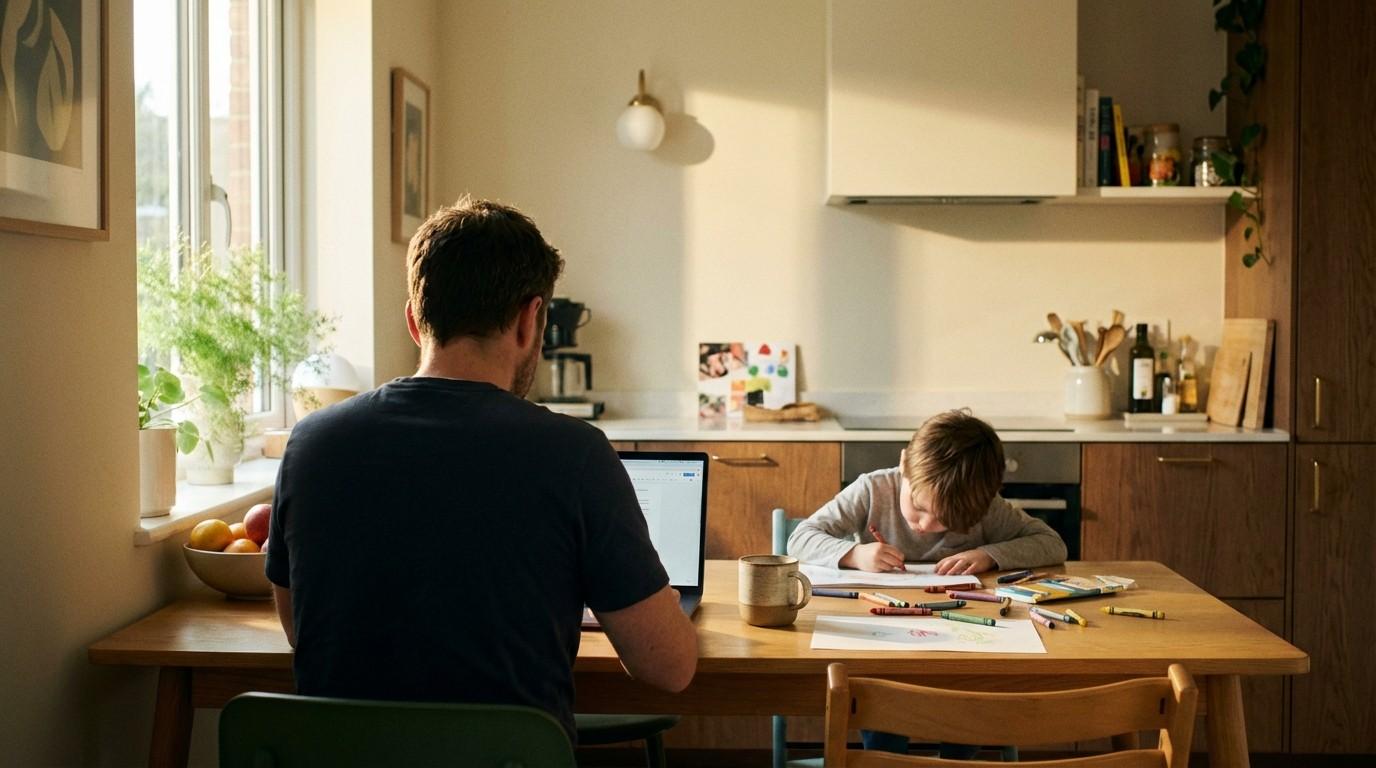
The truth is… most people overthink this. They spend weeks researching, months planning, and never actually launch anything. Meanwhile, busy parents across the country are using two free days to create their first digital product — and making their first sale before Monday morning.
In fact, digital products are one of the best side hustles for parents because you create them once and sell them forever. No inventory. No shipping. No customer service headaches.
Just your knowledge, a laptop, and one focused weekend.
Let me walk you through the exact step-by-step process — from blank screen to live product.
Table of Contents
– Why Digital Products Are the Smartest Side Hustle
– Best Ideas for Beginners (Build One This Weekend)
– Saturday Morning: Pick Your Idea and Plan It
– Saturday Afternoon: Design It in Canva
– Sunday Morning: Package and Price It
– Sunday Afternoon: List It and Start Selling
– After Your First Sale
– Your Weekend Starts Now
Why Digital Products Are the Smartest Side Hustle for Parents
Why are so many parents choosing digital products over freelancing, dropshipping, or affiliate marketing?
Because when you create your first digital product, you build the only side hustle where the work stops but the income doesn’t.
Essentially, you build something once — a planner, a template, a guide, a checklist — and it sells over and over. While you sleep. While you’re at soccer practice. While you’re making dinner.
According to Shopify’s digital products guide, the global digital product market has surpassed $124 billion in sales. That’s not a trend. That’s a shift in how people buy and learn.
Here’s what makes digital products parent-proof:
- Zero inventory. Nothing to store, ship, or restock. Your product is a file.
- Near-zero cost. You can create your first digital product using nothing but Canva’s free plan and a PDF export.
- Unlimited scalability. Selling one copy costs the same as selling 1,000 copies — nothing.
- Time freedom. After the creation weekend, your daily maintenance is 15-30 minutes.
If you’re exploring other passive income options alongside digital products, our guide to passive income ideas for busy parents breaks down four proven strategies that work together.
Digital products let you trade a weekend of effort for months of income. That’s the trade every parent should be making.
Best Digital Product Ideas for Beginners (Build One This Weekend)
Here’s where most people get stuck. They think they need a groundbreaking idea nobody’s ever thought of.
However, the opposite is true. The best-selling digital products solve small, specific, everyday problems. Not revolutionary ones.
Here are 7 beginner-friendly digital product ideas you can build in a weekend:
- Planners — Daily, weekly, or monthly planners for specific audiences (busy moms, students, freelancers). Build in Canva, export as PDF.
- Checklists — Moving checklists, wedding planning checklists, new baby checklists. Simple, useful, and people pay $5-12 for them.
- Templates — Social media templates, resume templates, budget spreadsheets. High demand, low creation time.
- Mini guides — Short, focused guides on one topic. “How to meal prep in 30 minutes.” “5 steps to organize your kitchen.” Keep it under 15 pages.
- Workbooks — Goal-setting workbooks, journaling prompts, habit trackers. Interactive PDFs that people fill in.
- Canva template packs — Instagram post templates, Pinterest pin templates, or presentation templates that other creators buy to save time.
- Printable wall art — Motivational quotes, nursery art, seasonal designs. Surprisingly profitable on Etsy.
The best part? You don’t need to be an expert in any of these. You just need to know slightly more than the person buying it. That’s it.
For a deeper dive into choosing your product and mapping out the entire business model, our Digital Product Playbook covers the complete A-Z — from idea validation to pricing strategy to launch plan.
Pick one idea from this list. Just one. That’s your project for this weekend.
Saturday Morning — Pick Your Idea and Plan It (30 Minutes)
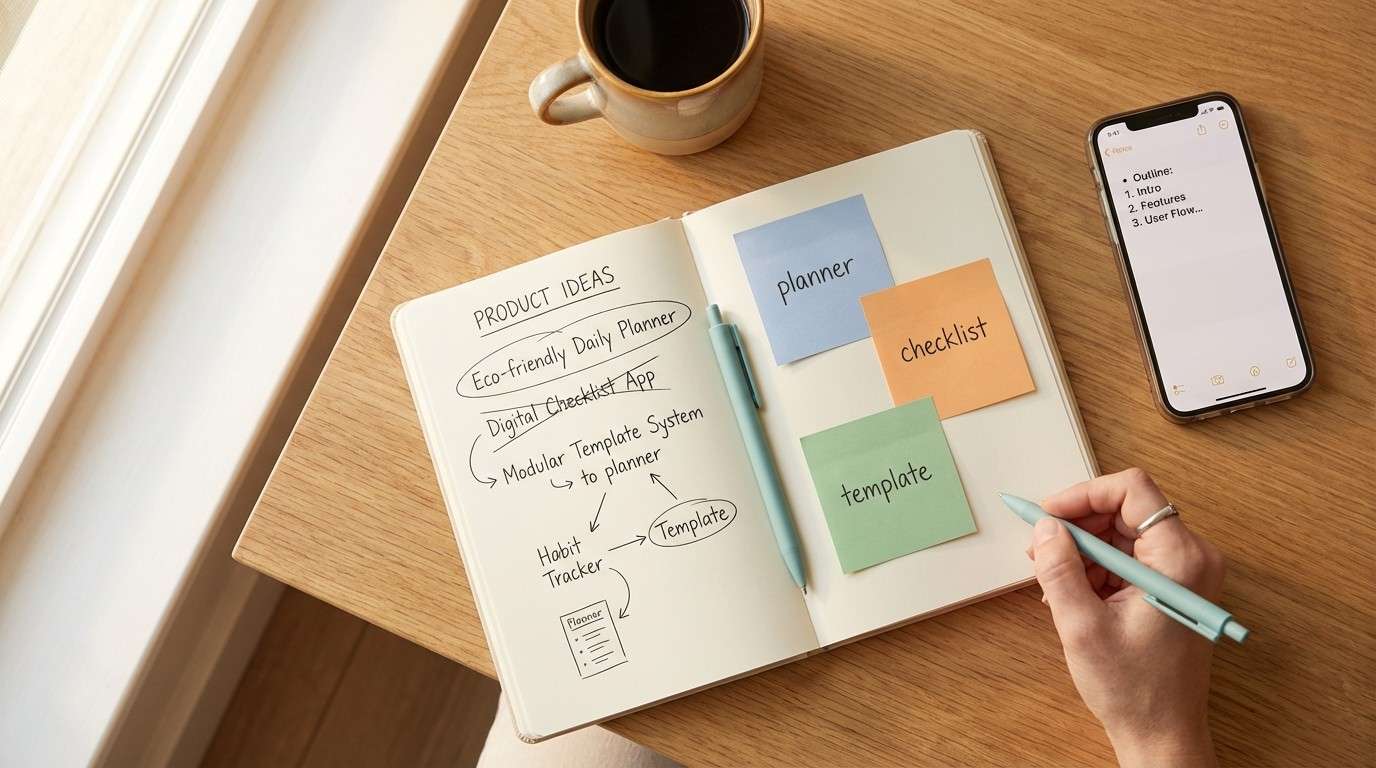
t’s Saturday morning. Coffee’s hot. Kids are occupied. You’ve got 30 minutes.
Here’s exactly what to do:
- Pick your product type from the list above. Don’t deliberate. Go with the one that felt most natural when you read it. Gut instinct wins here.
- Define your audience in one sentence. For example: “Busy moms who want to meal plan without spending hours on it.” Specific is better than broad.
- Outline your content. Open a notes app and write 5-10 page titles or sections. For a planner, that’s the daily layout, weekly overview, goals page, and notes page. For a guide, it’s 5-7 short chapters.
- Name your product. Keep it simple and benefit-focused. “The 30-Minute Meal Prep Planner” beats “Sarah’s Kitchen Helper” every time.
That’s it. 30 minutes. You now have a product plan that’s ready to design.
Similarly, don’t fall into the perfectionism trap. Your first digital product is not your masterpiece. It’s your proof of concept. Version 1 doesn’t need to be perfect — it needs to be done.
A finished product that’s 80% perfect outsells a “perfect” product that never launches. Every time.
Saturday Afternoon — Create Your Digital Product With Canva (Step by Step)
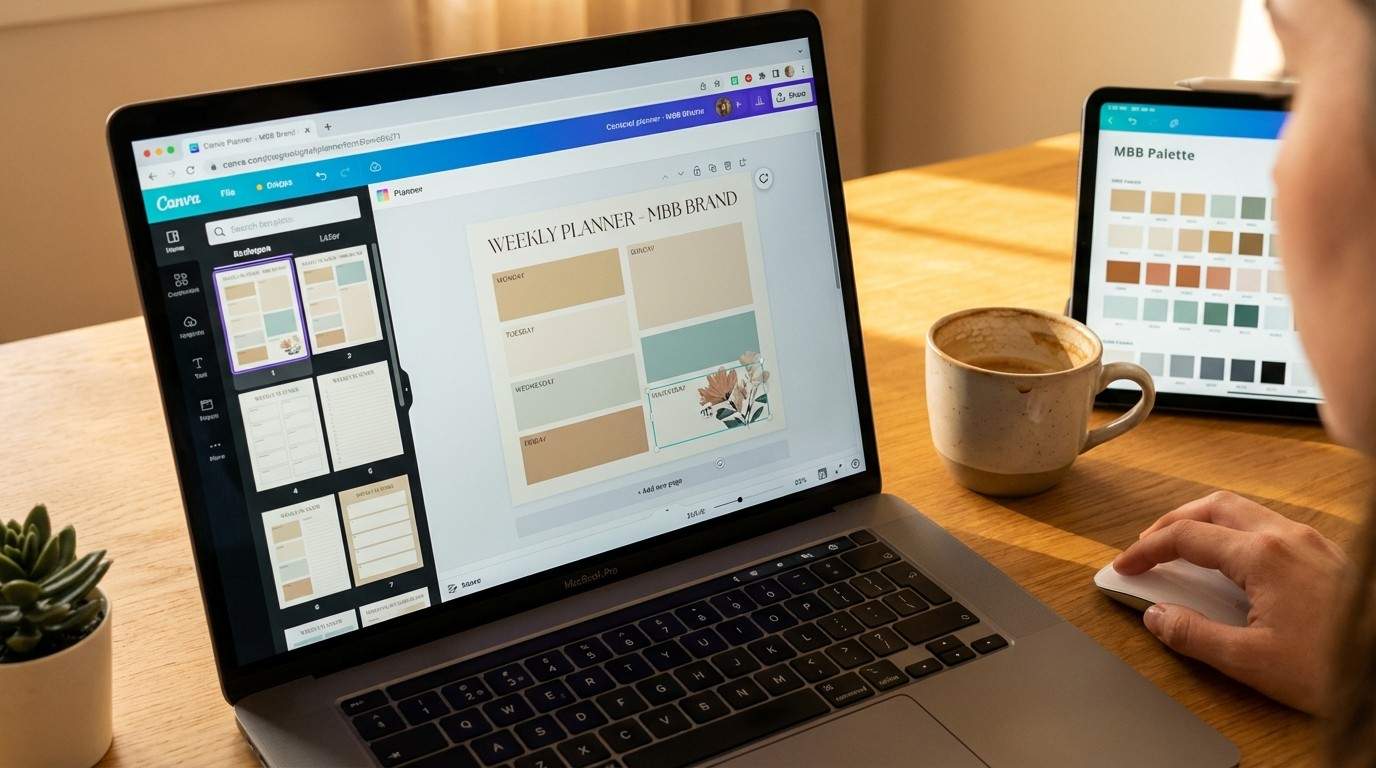
This is the moment. You’re about to create your first digital product listing — and it goes live.. And you don’t need any design skills to make it happen.
Fortunately, Canva is the tool that makes all of this possible. Free plan. Drag and drop. Thousands of templates built specifically for digital products.
Here’s your step-by-step process to create digital products with Canva:
- Open Canva and search for your product type. Type “planner” or “ebook” or “checklist” into the template search. Pick a template that’s close to your vision. You’ll customize it — you don’t need to start from scratch.
- Set your brand colors. Open the color palette and change the template colors to your brand palette. For MBB, that’s warm sand, soft cream, and muted gold. Consistency makes your product look professional.
- Replace the placeholder text. Swap in your own headings, descriptions, and content from the outline you created this morning. Keep text short and scannable — people buy digital products for clarity, not lengthy essays.
- Add your branding. Upload your logo (or create a simple text logo in Canva). Add it to the cover page and footer of each page. This small detail makes your product look 10x more professional.
- Design the cover page. This is the most important page because it’s what shows up in your product listing. Use a bold title, clean layout, and your brand colors. According to Canva’s Design School, covers with clear typography and minimal clutter convert best.
- Export as PDF. Click Share → Download → File type: PDF Standard → Download. That’s your finished product.
To be specific, expect 2-3 hours for your first product. After that, future products take 60-90 minutes because you’ll reuse your template.
If you want the complete Canva system — brand kits, batch creation workflows, template libraries, and the advanced features most beginners miss — the Canva Playbook walks you through everything step by step.
By Saturday night, you’ll have a finished digital product sitting on your desktop. That feeling? That’s the feeling of a creator.
Sunday Morning — Package and Price It (30 Minutes)
Your product is built. Now you need to make it sellable.
Typically, packaging and pricing is where most beginners freeze up. So let’s keep it dead simple.
Packaging:
- Create a mockup image. In Canva, search “ebook mockup” or “tablet mockup.” Place your cover design onto the mockup. This makes your PDF look like a real, tangible product. Takes 5 minutes.
- Write a product description. Use this formula: [Who it’s for] + [What problem it solves] + [What’s inside] + [What they’ll walk away with]. Keep it under 150 words.
- Choose your file format. PDF is standard for planners, guides, and checklists. If you’re selling Canva templates, share a Canva template link instead.
Pricing:
For your first digital product, price between $7 and $17. Here’s why:
- Under $7 — feels too cheap. People assume it’s low quality.
- $7-$17 — the sweet spot for first-time buyers. Low enough to be an impulse purchase. High enough to feel valuable.
- Above $17 — save this for bundles or more comprehensive products later.
Therefore, your first digital product to sell should sit at $9 or $12. That’s the “no brainer” price point where someone thinks “I’d be silly not to grab this.”
A product that’s priced, packaged, and ready to list is worth infinitely more than an idea sitting in your head.
Sunday Afternoon — List It and Start Selling (30 Minutes)
This is the moment. Your product goes live.
Fortunately, you have several platforms to choose from. Here are the best options for beginners who want to sell digital products online:
- Beacons.ai — Our recommended platform. Simple storefront, instant delivery, and you can set it up in 10 minutes. This is what we use at MBB.
- Etsy — Built-in audience of buyers already searching for digital products. Higher competition but also higher traffic. Great for planners, templates, and printables.
- Gumroad — Clean and minimal. Good for single products and early-stage creators. Free plan available.
- Your own website — If you already have a WordPress site, add WooCommerce or link to your Beacons storefront. Long-term, this is where you want all traffic to land.
For your first launch, pick ONE platform. Don’t try to list everywhere at once. Get your first sale on one platform, then expand.
On the other hand, wherever you list, make sure your product listing includes your mockup image, your description, a clear price, and instant digital delivery. That’s all a buyer needs to click “purchase.”
By Sunday night, your product is live. Someone, somewhere, can buy it right now. That changes everything.
What Happens After Your First Sale
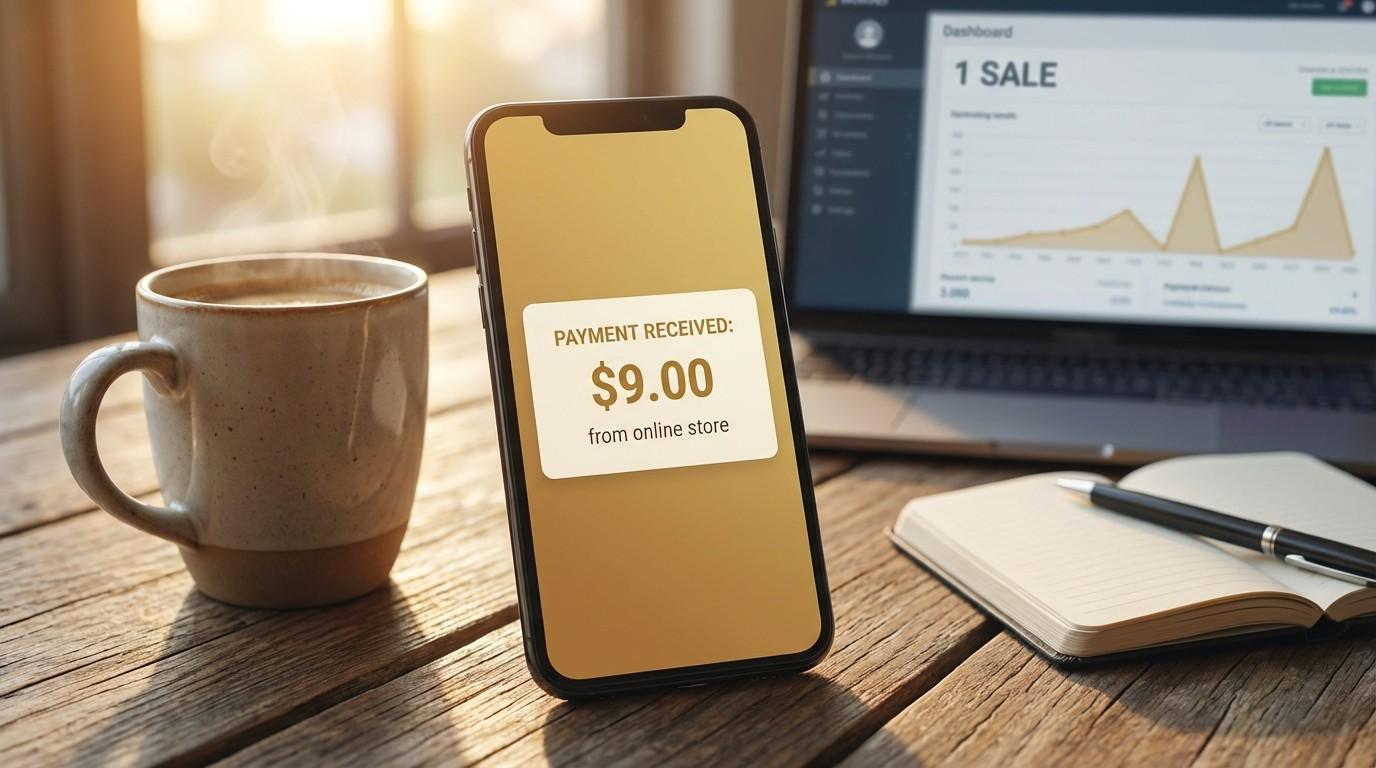
Without question, the first sale hits different.
It’s not about the $9. It’s about the proof. Proof that you can create something people want. Proof that you can make money selling digital products without a boss, a schedule, or a commute.
After your first sale, here’s what to do next:
- Create a second product (next weekend). You already know the process. Your second product will take half the time. Build a complementary product — if you made a planner, make a matching checklist or workbook.
- Bundle your products. Two or three related products bundled together at a slightly higher price ($19-$27) increases your average order value without any extra traffic.
- Start building an email list. Offer a freebie version of your product (a single page or a mini checklist) as a lead magnet. This is how you stop depending on platform traffic and start owning your audience.
- Promote through content. As a result, every blog post, Pinterest pin, and Instagram carousel becomes a traffic funnel pointing at your product.
If you want to see how content promotion works in practice, our post on how to build a faceless brand side hustle in 30 minutes a day shows the exact month-by-month content system. And our guide to the best faceless marketing tools covers every free tool you need for promotion.
Your first product is the foundation. Everything else — the brand, the audience, the income — gets built on top of it.
Your Weekend Starts Now
You’ve seen the entire process. Four sessions across two days. Each one fits into a 30-minute to 2-hour window.
Here’s the honest recap:
- Saturday morning (30 min): Pick your idea, define your audience, outline your content.
- Saturday afternoon (2-3 hours): Design your product in Canva using a template.
- Sunday morning (30 min): Create your mockup, write your description, set your price.
- Sunday afternoon (30 min): List it on Beacons, Etsy, or Gumroad. Go live.
Total time to create your first digital product: roughly 4-5 hours across two days. That’s less than a Netflix binge.
Above all, the difference between you and someone who’s already selling digital products isn’t talent. It isn’t luck. It’s just one weekend of focused action.
Everything you want exists on the other side of fear.
Want the complete system? The Digital Product Playbook covers the full A-Z — idea validation, pricing psychology, launch strategy, and scaling. And the Canva Playbook shows you exactly how to design professional products fast.
Or start free — our Faceless Marketing Mini Guide shows you how to promote your products without ever showing your face.
No hype. No burnout. Just balance.