Why are you staring at a blank Canva canvas instead of posting?
Every hour you spend redesigning from scratch is an hour you’re not growing. There’s a better way — and it takes 30 minutes to set up once.
What’s Inside This Guide:
- The myth that stops non-designers from even trying — and why it’s completely backwards
- A reusable 5-template system you can build in 30 minutes and use for months
- The exact step-by-step to create your first social media template in Canva today
- How to keep your brand consistent across 20 posts without thinking about it
- The hidden tricks that let one template work on Instagram, Pinterest, and TikTok
- Which Canva features are actually worth your time (and which ones beginners can ignore)
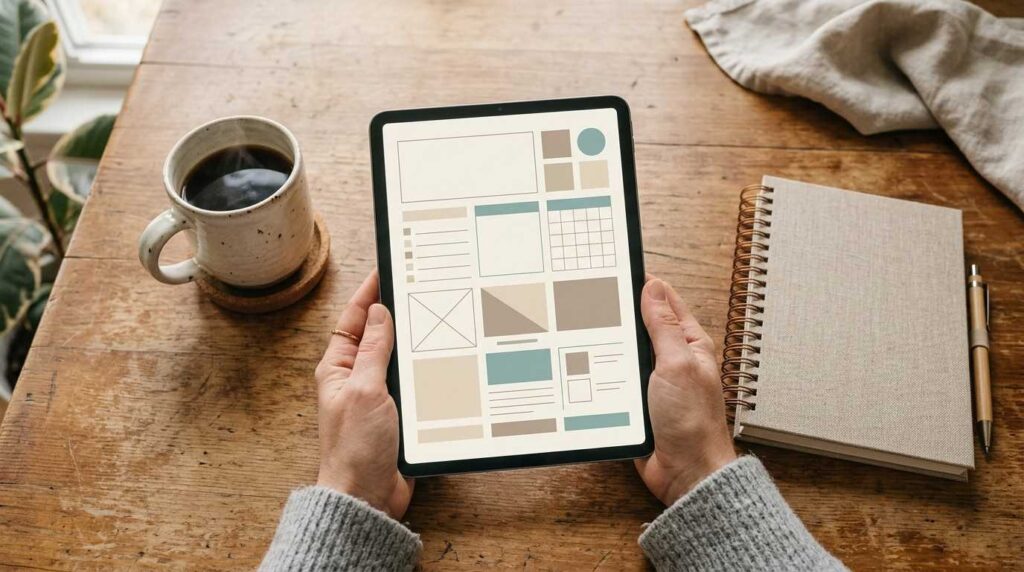
Instead of Designing Every Post, Build a System
Sound familiar?
You open Canva. You stare at the blank page. You spend 45 minutes picking fonts, then change them anyway. You post something that looks “fine.” You do it all again tomorrow.
That’s not a content problem. That’s a systems problem.
The truth is, you don’t need design skills to look professional online. You need a system that does the thinking for you — so you just show up, swap the words, and hit publish.
Social media templates in Canva solve exactly that.
When you have templates ready to go, there’s no decision fatigue. No “should I use this font or that one?” No starting from zero every single time. You’ve already made the creative decisions. Now you’re just filling in the blanks.
Here’s something else nobody talks about: your audience doesn’t care if YOU designed it. They care if it looks intentional. Templates look intentional. Blank-canvas panic posts? Those don’t.
If you’re building a faceless brand as a side hustle, this system is the foundation everything else builds on. Because consistent visuals aren’t a nice-to-have. They’re how strangers become followers and followers become buyers.
One template, done right, is worth a hundred one-off posts.

Here's the 5-Template System for Faceless Social Media
This is the framework.
Five template types. One 30-minute build session. Infinite posts.
Every successful faceless creator — whether they’re on Instagram, Pinterest, or TikTok — uses some version of this. The difference is they built it on purpose. Now you will too.
Template 1: Quote or Text-Heavy Post
Think 80% text, 20% visual. This is your go-to for sharing a mindset shift, a hot take, or a one-liner that makes someone stop scrolling. Simple backgrounds. Bold fonts. High contrast. Time to build: 5–6 minutes.
Template 2: Product or Resource Spotlight
Centered focal point. Clean layout. This template sells without screaming. Use it to highlight a digital product, a tool you love, or a link-in-bio offer. Time to build: 5–6 minutes.
Template 3: List or Carousel Slide
Three to five points, each on its own “slide.” This format is the highest-save content type on Instagram right now. People bookmark lists. Build this one and you’ll use it weekly. Time to build: 5–6 minutes.
Template 4: Before-and-After or Side-by-Side Comparison
Split the canvas. Left side shows the problem. Right side shows the solution. This works for parenting, productivity, digital products — basically any niche. Time to build: 5–6 minutes.
Template 5: Story or Testimonial Layout
Narrative-driven. Slightly more text. This is where you share a mini win, a reader result, or a personal moment that connects. Even faceless accounts need a human element. Time to build: 5–6 minutes.
Build all five in one session. That’s your 30 minutes. And here’s the thing — you’ll never need to start from scratch again.
If you’re newer to Canva and want to understand the full interface before you build, the guide on creating digital products with Canva is a solid place to start first.
Here's the Exact Step-by-Step to Build Your First Template in Under 10 Minutes
No fluff. Just the steps.
Step 1: Set your dimensions. 1080×1080 pixels for Instagram. You can resize for other platforms later. Start square.
Step 2: Pick ONE color palette. Two to three colors max. Your background color, your text color, and one accent. Don’t freestyle this — pick it once and commit. Canva’s color picker lets you enter hex codes directly. Coolors.co is a free tool that generates beautiful palettes in seconds.
Step 3: Choose ONE font pairing. A headline font and a body font. That’s it. Free Canva fonts are completely fine — Playfair Display + Lato, Montserrat + Open Sans. Pick, lock it in, done.
Step 4: Add a background shape or frame. Keep it simple. A solid color background. A subtle gradient. A thin border box. You’re not decorating — you’re creating a container.
Step 5: Add placeholder text. Type “Your Headline Here” in the headline spot. Type “3–5 bullet points” in the body area. These are reminders, not real content. They hold the space so you never lose your layout.
Step 6: Save it as a template and duplicate. Name it something you’ll actually find (“Quote_V1,” “Product_Spotlight_V1”). Every time you need a post, duplicate the template — never edit the original.
Pro tip: Use Canva’s built-in Tidy Up feature to align your elements automatically. It’s in the right-click menu and it makes everything look intentional in one click — no design eye required.
According to Canva’s own platform data, there are over 250,000 free templates available on a free account — so if you ever need inspiration for your layout, start there and strip it back to basics.
Once You Have Templates, Here's How to Keep Your Brand Consistent
This is where most beginners drop the ball.
They build great templates. Then they tweak the font on Tuesday, change the colors on Thursday, and by Saturday their feed looks like four different people run it.
Don’t do that.
Use Canva’s Brand Kit (available on the free account) to lock in your colors and fonts from the start. Every time you open a design, your brand colors are right there — no guessing, no inconsistency.
Create a naming system for every template you build. “Quote_V1,” “List_V2,” “Product_V1.” This sounds boring. It saves you from digging through 47 untitled designs at 10pm.
Here’s the rule: swap the text and images, but keep the layout untouched.

The layout is your brand fingerprint. Change the content, not the structure. Your audience will start to recognize your posts before they even see your name — and that’s exactly what you want.
Screenshot your best-performing posts too. Seriously. Those layouts are already proven. Recreate them as templates and reuse the formula.
If you want to go deeper on brand consistency and how it connects to your content strategy, the post on building a faceless brand side hustle breaks this down in detail.
Consistency isn’t about being boring — it’s about being recognizable.
The Best Part? One Template Can Live Everywhere
You built five templates. But you can post them on Instagram, Pinterest, and TikTok.
Here’s how.
Your 1080×1080 square works on Instagram. To use it on Pinterest, resize to 1000×1500 (tall). For TikTok, go vertical at 1080×1920. The core layout — your fonts, colors, and structure — travels with it.
Canva’s Magic Switch feature (a Pro tool) does the heavy lifting on resizing. It shifts your elements automatically when you switch dimensions. You adjust the rest manually — usually a 2-minute fix per platform.
This is how you batch.
Build your 5 templates once. Resize each to 3 platforms. That’s 15 post formats from one 30-minute session.
From there, create a master folder called “Base Templates.” Every time you want to post, duplicate from that folder — never edit the originals. Use Buffer, Later, or your platform’s native scheduler to queue them all at once.
Forty-five minutes on a Sunday. Posts scheduled for the whole week. That’s the system.
For more on how to batch and scale content as a faceless creator, the post on growing Pinterest without a camera shows exactly how this plays out in practice.
You stop posting daily. You start managing a content system.
The Truth Is, You Don't Need Canva Pro Right Now
Let me be real with you.
You can do 90% of everything in this post on a free Canva account. That is not hyperbole.
The free account gives you access to 250,000+ templates, 100+ design types, and over 1 million free photos and graphics. That’s a serious library. Most beginners never outgrow it.
The paid features worth upgrading for eventually? Premium stock photos, Magic Switch for resizing, and the ability to apply your Brand Kit across all designs automatically. Those are genuinely useful when you’re scaling.
The paid features you won’t miss? Advanced animations, complex text effects, the extras that look exciting in YouTube tutorials and collect dust in real life.
Here’s the rule: if you’re making $0 right now, start free. Upgrade when your templates are generating consistent income. Spending money to look busy isn’t a strategy — it’s a comfort purchase.
For a full breakdown of what’s free versus paid and which tools are actually worth your time, The Canva Playbook walks you through every feature in plain language — including a side-by-side comparison table so you can make the call yourself.
The best tool is the one you actually use. Start free. Stay consistent. Upgrade with intention.
Ready to Stop Redesigning Every Single Post?
Everything in this post is a starting point.
The Canva Playbook takes you further — step-by-step through the full Canva interface, customization techniques, design tricks for beginners, and the tools that help you create faster without guessing. It covers everything from loading your first template to unlocking pro-level design hacks — no design experience needed.
Your move right now?
Pick one template format from the five above. Open Canva. Build it in the next 30 minutes. Then duplicate it ten times before Friday.
You don’t need to be a designer. You need a system.
Now go build yours.